Part of my job is doing POCs with customers to help with Azure Data Services. Anything that helps me move quicker is helpful so I’m a tad bit obsessed with automating things. I have used PowerShell for more years than I’m willing to admit to help me automate what I can. There are a lot of ways to automate things like ARM templates and DevOps, but PoSH has been my preferred hammer. As much as I love it, I’ve ran into issue sometimes with installing modules locally on folks machines and not to mention if they have a Mac. I wondered recently if Azure Cloud Shell would help make things easier, and it very much did and I’m super pumped to share! This post will help run through how to get setup to run PowerShell scripts in Azure.
Navigate to and login to the Azure portal (azure.portal.com). Start Azure Cloud Shell by clicking the >_ icon in top right. I overlooked it forever so here’s a view of it below

If necessary change from Bash to PowerShell. It will require us to connect some Azure blob storage to it or create a storage account to use if you haven’t already. This post below gives further details on this (https://docs.microsoft.com/en-us/azure/cloud-shell/persisting-shell-storage).
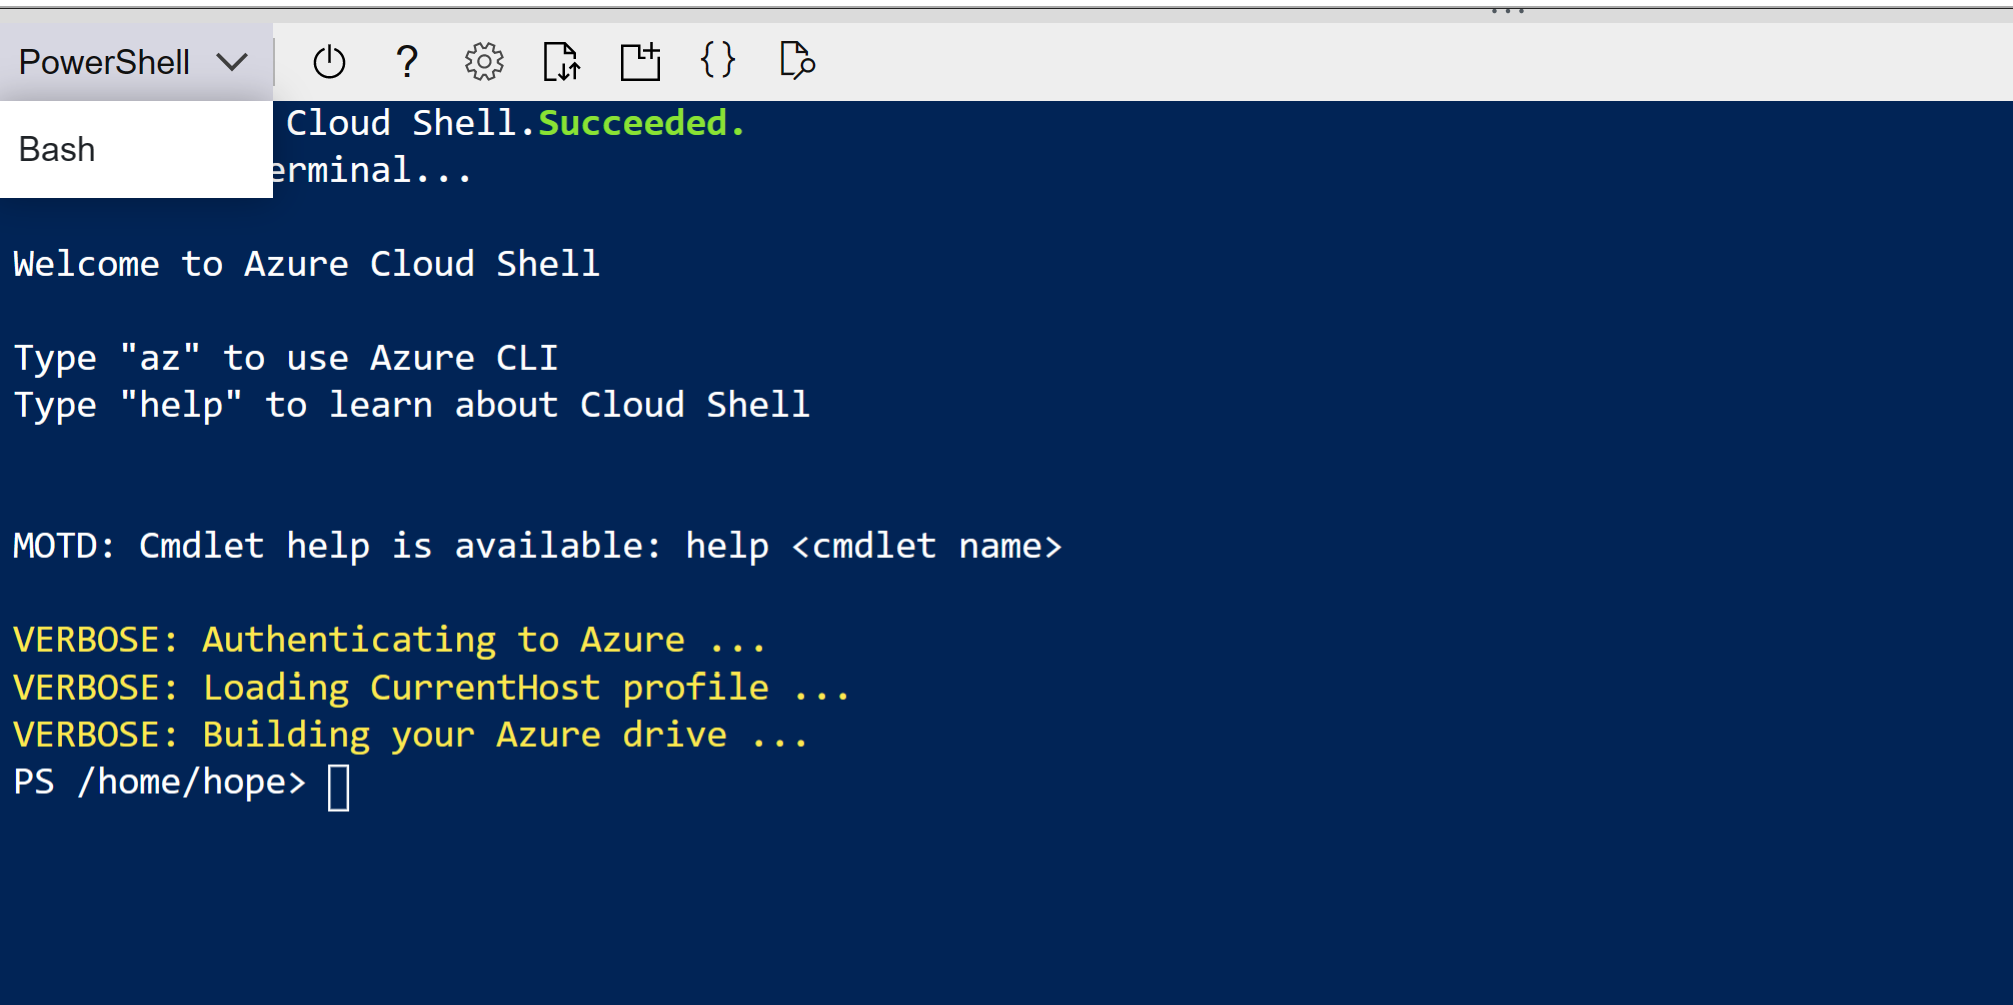
If you’re not prompted to setup storage you may have already done so, and like me didn’t remember it. You can figure out the details of the storage account by using the command: get-clouddrive
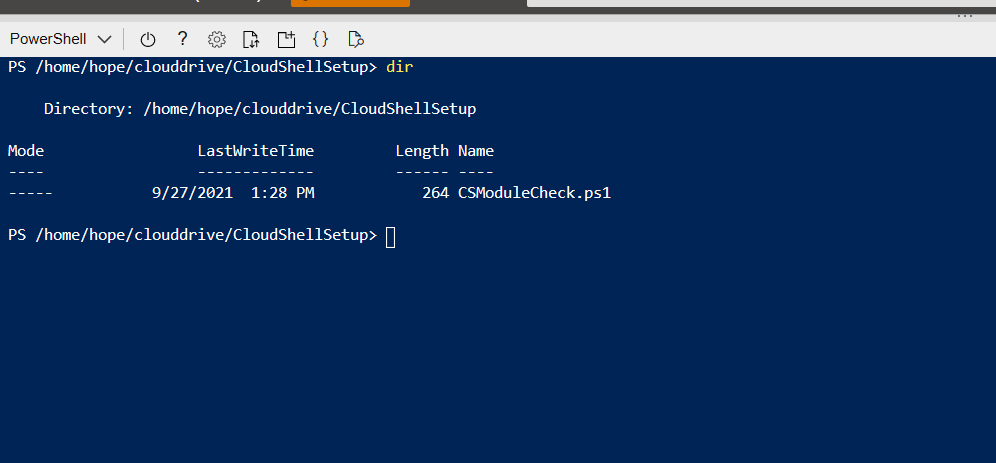
You can navigate the same as you would locally. Type the command: dir and you should see at least one folder called clouddrive. Navigate to it by typing the command: cd clouddrive This is the location where you’ll be able to upload and interact with your files. Next we’ll upload a PowerShell script to this location to check for modules needed for upcoming blogs to create items in Azure.
Navigate to the storage account that is tied to Azure Cloud Shell. I like to use Azure Storage Explorer (https://azure.microsoft.com/en-us/features/storage-explorer). You’ll expand File Shares and you should see the file share listed when you ran get-clouddrive. You may see a folder for system use called .cloudconsole. Download the PowerShell script from my github repo at https://github.com/hfoley/AzureCloudShell called CSModuleCheck.ps1. Then upload that file to your Azure Cloud Shell file share location. Now within the Azure Cloud Shell console check to make sure the file is seen by running another dir command.
Now we confirmed we can see the file, we’ll run that script by using the command below:
./CSModuleCheck.ps1
What this script does is check and list the versions of the modules you see here.

If you do not see one listed like Az.Synapse, then we can install it. All you need to do is run the command below:
Install-Module -Name Az.Synapse
And that’s all there is to it! You’re all set to run PowerShell scripts in Azure Cloud Shell. Up next I’ll go through how I use Azure Cloud Shell and PowerShell scripts help my customers setup a full Synapse environment including pipelines (https://hopefoley.com/2021/11/02/how-i-start-my-synapse-analytics-pocs/).

2 thoughts on “PowerShell in the Clouds”