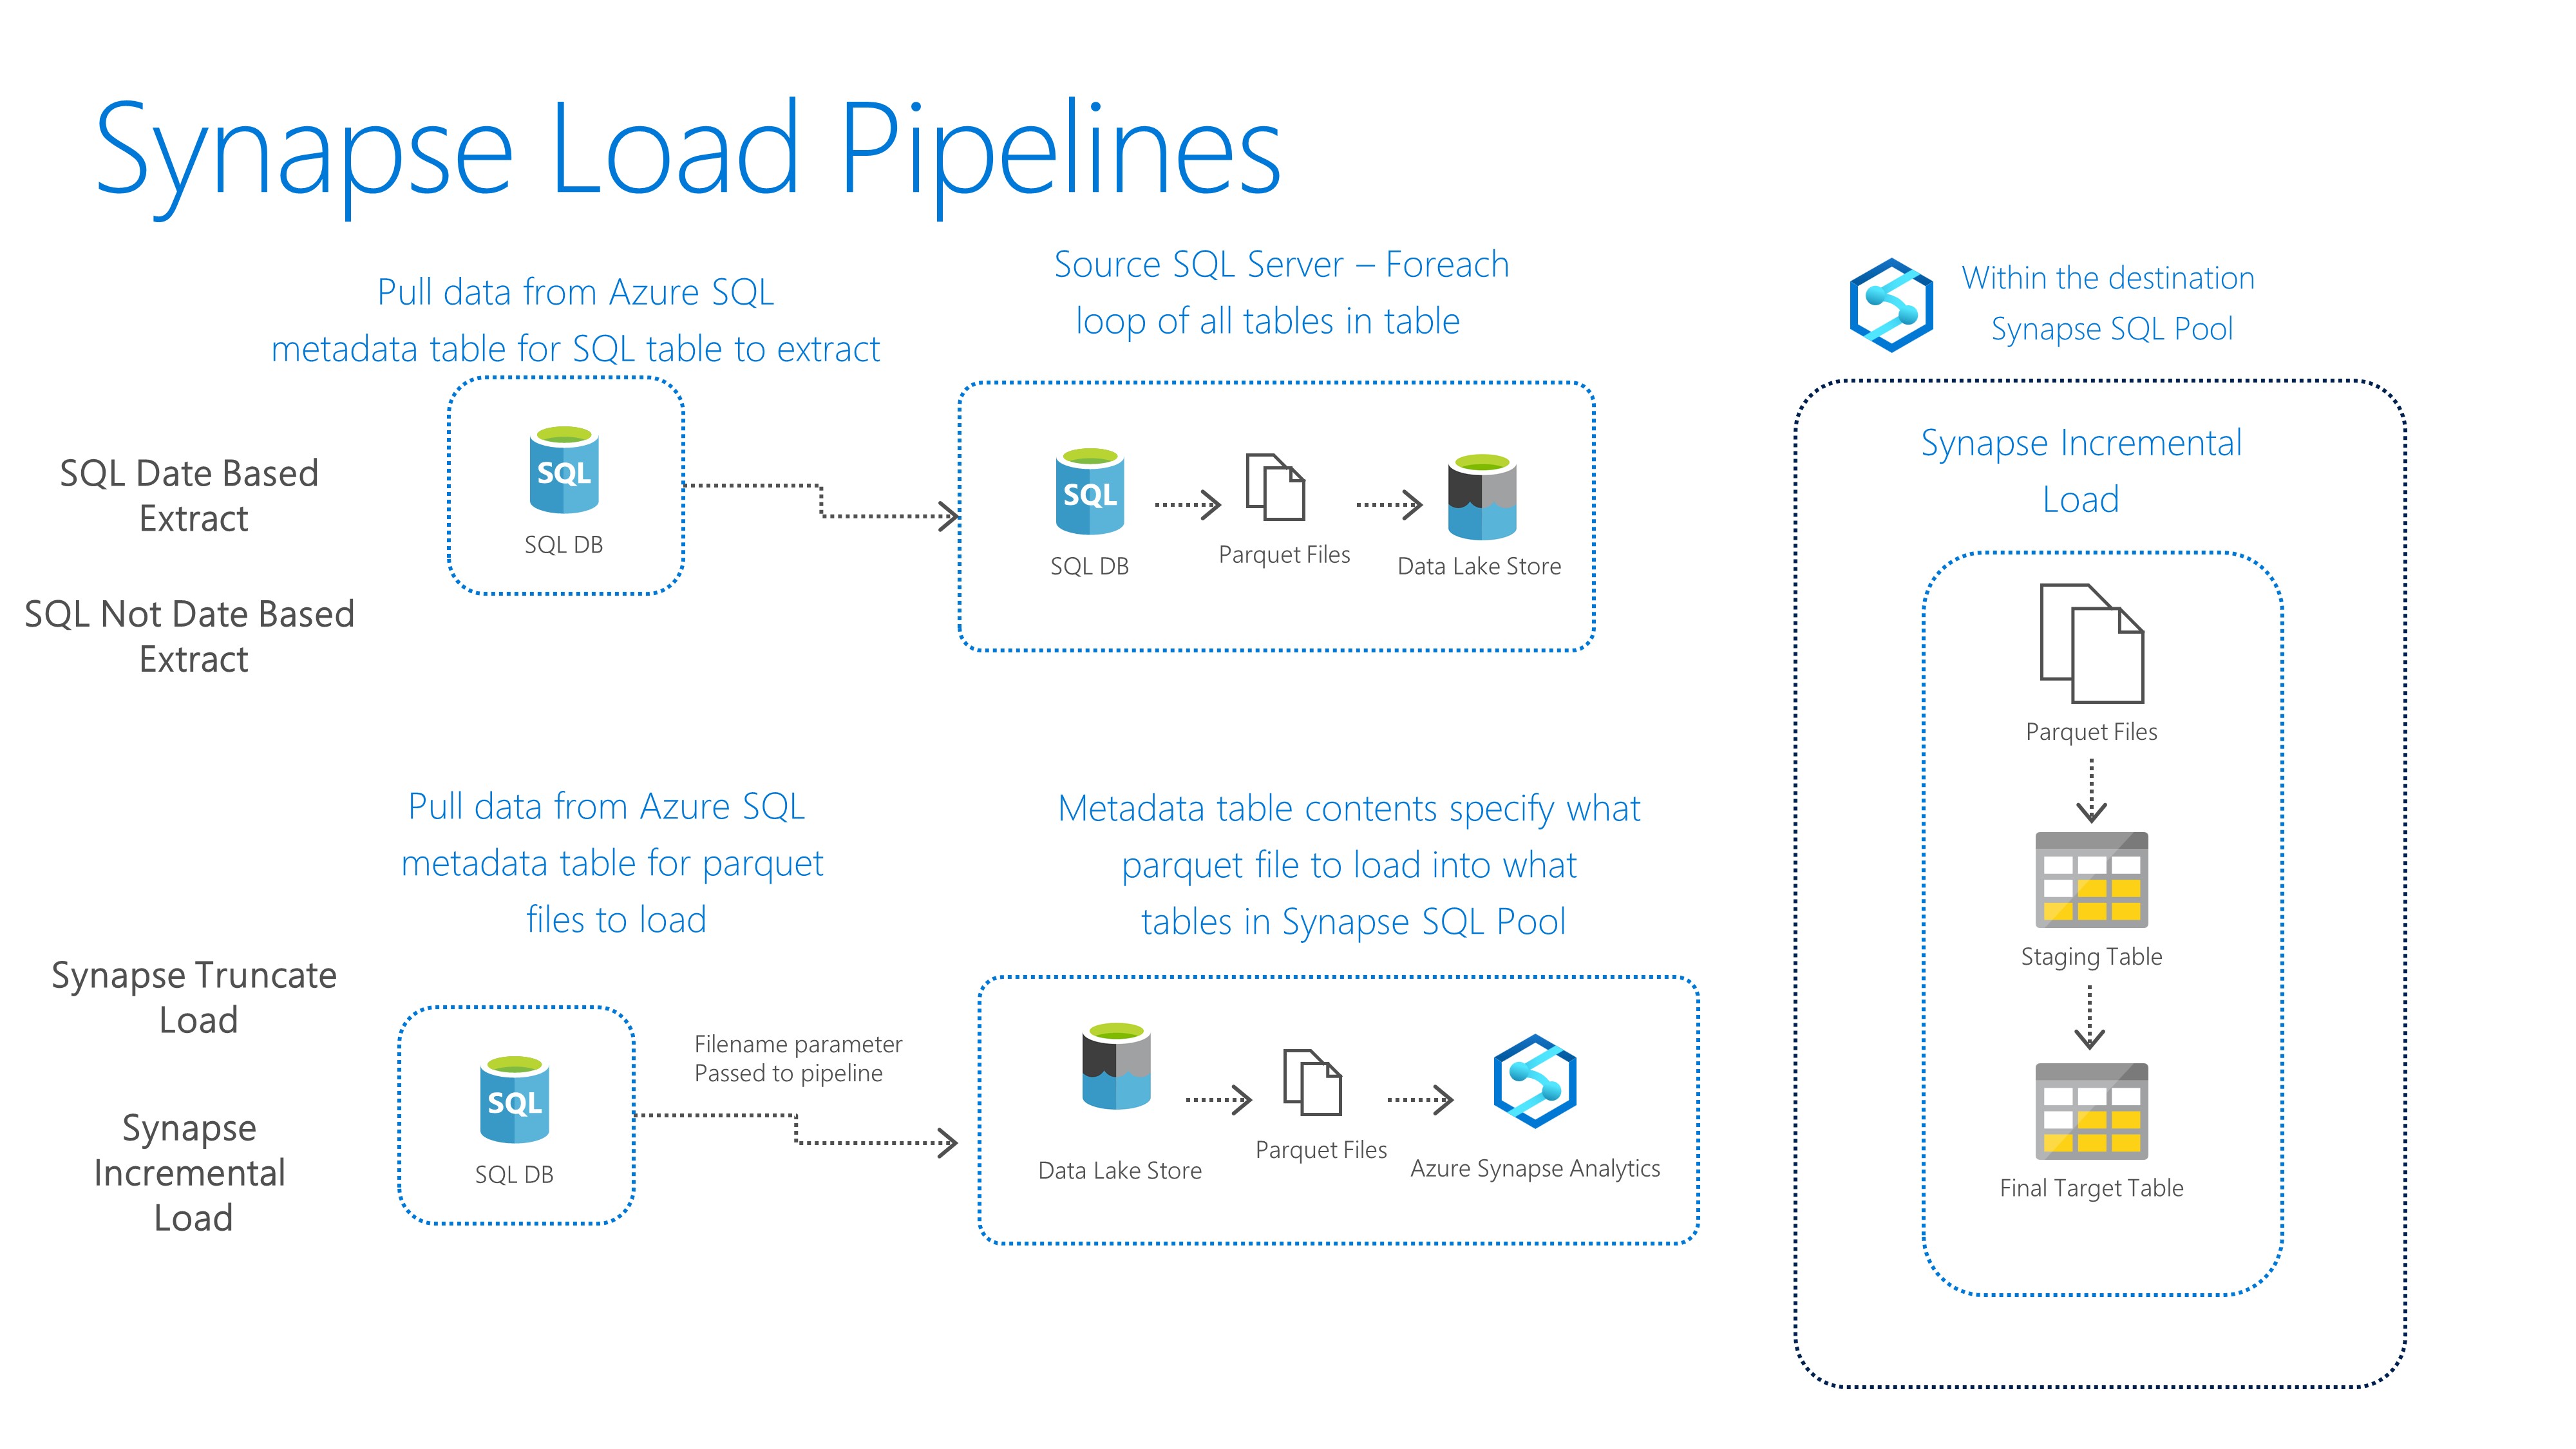
I love my job! One of the things I do for a living is to help customers get started with new services in Azure to finagle their data. Many times we’ll start with a small POC to just start to understand the parts and pieces, and I teach them along the way. I work with a lot of customers so being quick and nimble helps. Lately I’ve been using PowerShell to setup the pieces needed for a full Synapse Analytics environment, including an example set of 4 pipelines (2 to extract to ADLS, 2 to upload to dedicated SQL pool). Pulling data out of large relational databases into the data lake became a request I heard over and over so I automated it. I’ve added and tweaked this over the years into a project I called “Synapse Load” and put a version out in my github.
I want to pick up where I left off in my last post (https://hopefoley.com/2021/09/27/powershell-in-the-clouds/) and show how I can use the code in the repo above to setup a full environment for Synapse including the pipelines below.
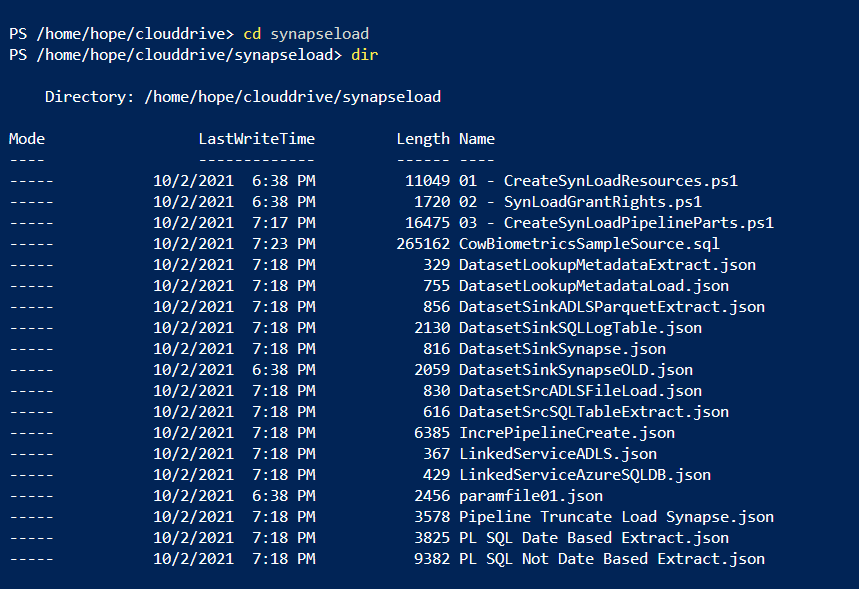
Download a SynapseLoadV2-master.zip from the repo above and extract them locally. We’ll setup the full sample so all the files we’ll need are in the SynapseLoadV2-master\03 Sample folder. Open the paramfile01.json file and edit all the values that contain <text>. For example here’s the values for the Azure SQL Server and DB after editing. You can supply existing resources and the create will skip them.
“azsqlserver” : “yoursqlservername”,
“azsqlDB” : “yoursqldbname”,
Open up Azure Storage Explorer and navigate to the file share Azure storage location for running CLI/PowerShell. I create a folder called SynapseLoad. We need to load all the files from 03 Sample folder except the *.sql files (SQL scripts will be run from SQL client of preference). Copy those files and put them into the Azure file share location for your CLI. Here’s a view of what you should see in your PowerShell session in Azure portal.
The paramfile01.json file we updated drives everything we’ll create in Azure. Let’s do one last look at what’s in it from the CloudShell to be safe. Type in cmd: get-content ./paramfile01.json
After you’ve validated it, we’re ready to run the scripts. The 01 – CreateSynLoadResources.ps1 will create all the components in Azure. We’ll run this in the CLI:
./”01 – CreateSynLoadResources.ps1″ -filepath ./paramfile01.json
Detailed instructions can be found in the readme at https://github.com/hfoley/SynapseLoadV2/tree/master/03%20Sample as well.
You’ll get a couple prompts to create SQL admin user/passwords and when complete verify in Azure portal the components completed. We need to run a script to update some rights needed to view data in Synapse. You run that in CLI:
./”02 – SynLoadGrantRights.ps1″ -filepath ./paramfile01.json
The Synapse pipelines are created by running the following script. This script updates the json files we need to build the pipelines and then runs after updates occur.
./”03 – CreateSynLoadPipelineParts.ps1″ -filepath ./paramfile01.json
You can now go into Synapse Studio (link in Azure Portal if you click on the resource). You should see the following pipelines.

You will need to run the scripts to create the metadata tables, the source table, and destination tables inside of the dedicated SQL pool. The steps in the https://github.com/hfoley/SynapseLoadV2/blob/master/03%20Sample/readme.md walk through this in detail. After you’ve set the sources in the metadata tables. The SQL Date Based Extract PL pulls base on date range. SQL Not Date Based Extract PL is driven by a where clause extract (i.e where Animal = 9111 in the sample). You can then upload the parquet files after updating the [ADF].[MetadataLoad] table with your parquet filename(s). The filename is the match to the table field values that are used to get target table information. One is for truncating/reloading patterns and one is for incremental loading.
I have a million ideas to make this better. What’s yours? Please let me know if you have feedback and if this helps you, I so want to hear it!

2 thoughts on “How I Start my Synapse Analytics POCs”